


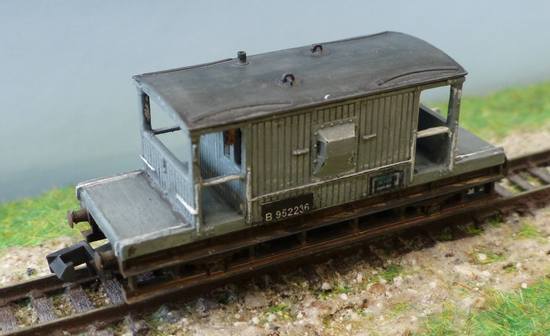
BR Brake Van from a Peco kit
I have a Peco BR Brake van in bauxite colour but I needed another brake van. Following earlier experience with the Peco kits, I decided to make one from a Brake Van kit, this time in grey (unfitted). The grey version has the advantage that the number and other information is on black panels which could be printed out on paper and fixed to the sides.
This article discusses the procedure in building the brake van.
The kit
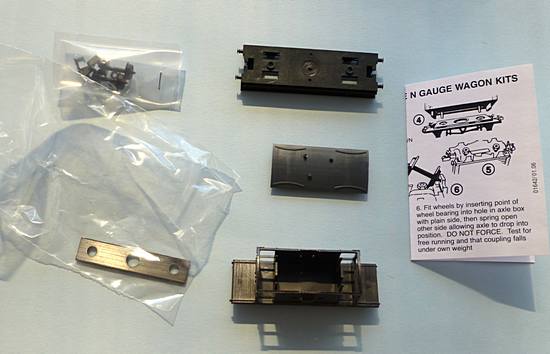
The basis of the wagon was a Peco kit KNR-28 LNER/BR 15ft Brake Van. The kits are inexpensive and easy to put together. For very little money, you get:-
- A ready-made body
- A roof
- An underframe
- A bag containing wheels, couplings and two fixing nuts
- A weight which fits on top of the underframe
- Instructions
The two threaded nuts are supposed to fit on two unthreaded spikes at the base of the body after the underframe has been fitted. My recommendation is not to try to fit these nuts as it can drive you mad. Either permanently glue the spikes to the underframe or use blue-tack or tacky glue so that it can be taken apart if needed.
The only real preparation is to remove any remnants of a moulding spike on the top of the underframe and file it flat. The rest is mainly painting which should be carried out on the separate parts.
The underframe
This was painted with matt black enamel, followed by two washes of a brown earth-like colour (Wilco Nutmeg Spice acrylic testpot) to give it a rusty weathered appearance. The plastic Peco wheels are adequate but it is better to fit Graham Farish (Bachmann) wheels which have metal axles.
The body
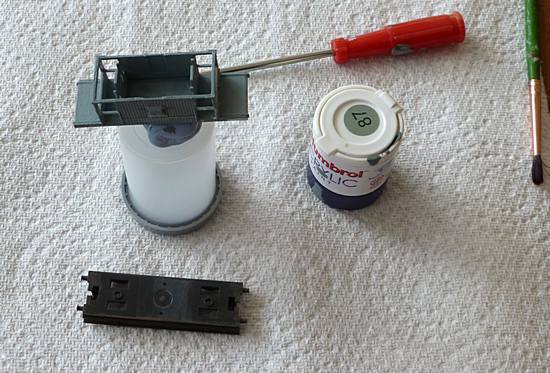
The body is in a dark plastic which is ideal if you are doing a BR Bauxite version, but if you are doing a grey version, it is better to start with a light undercoat. I painted it first with two coats of matt white enamel and then with steel grey Humbrol 87 (Acrylic).
The handrails were painted matt white with a fine brush. Some of the grey had to be touched up afterwards.
I put two pieces of clear plastic 12x12mm inside the cabin stuck with pva to glaze the windows and doors. This was probably a waste of time as you cannot see them. I also added an extra weight in the cabin and fixed it with bluetack.
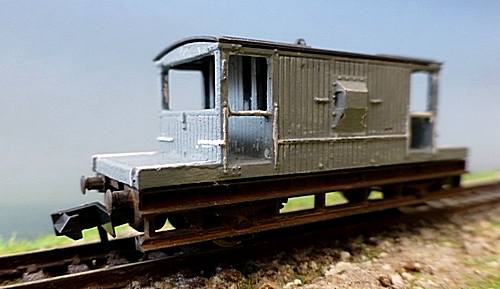
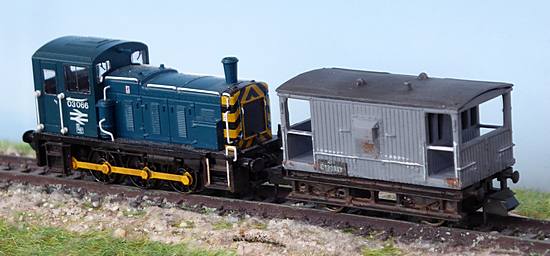
BR Brake Van after painting
The number panel as shown below was produced in Paint Shop Pro. This was rescaled and printed out on ordinary
(80 gm-2) paper. The other panel I produced by cheating. I took a sideview image from the internet of an
OO Gauge 16T Mineral Wagon. This was resized and printed on paper and the info panel cut out. All black panels were fixed with Johnsons Klear to the body.
The last operation was to make the body dirty by giving it several washes with black acrylic. The black collects in the grooves accentuating the wood strips and disguises the edges of the black panels (OK, well not completely!). See the image at the top of this article for the final effect.

The roof
The roof is practically the right colour (but shiny) and you can leave it as it is. I tried giving it several washes of acrylic Flintstone (Wilco testpot) but it was very blotchy as the roof had not been primed. The paint was cleaned off.
The roof was then painted with Humbrol Roof Lead enamel. There was good coverage but the colour was too green. This was then painted with the flintstone acrylic. Now there was better coverage but the colour was too light. It was given several black washes (acrylic) to tone it down. The result is slightly patchy but I reckon that is realistic for a weathered roof.
The moral of this tale is that you are better to start with a grey primer.
Peco 10T ex-LNER brake van (Toad B)
More recently I have built an ex-LNER 10ft Brake Van from Peco Kit KNR-49. The build is similar to that described above but I have tried to improve on the procedure based on that experience.
The body and roof (originally white in kit) were spray painted with Halfords grey primer. I found later that for the roof, the unpainted underside was a problem showing as white, so sprayed underside as well with grey. The roof was then painted with a mixture of flintstone acrylic and matt black acrylic to give a dark grey.
I chose a thinner paper - computer listing paper(60 gsm) - to print out the number panel and the panels were fitted either side left with Klear.
I have not added a right panel - it is very small with small letters "20 - 0". Paul Bartlett's photos show that it was not on all examples he photographed.
Conclusions
The Peco kits allow you to build a brake van for little money and allow you to develop your painting skills in the process.
References
- EM Gauge Brake Vans. Inspiring work from a group of EM Gauge modellers
- Instructions for a Connoisseur Models 0 gauge BR Brake Van Kit. Lots of background information on BR Brake Vans.
- Paul Bartlett's Photographs BR Brake Van
- Paul Bartlett's Photographs LNER Brake Van
- Peco Website (KNR-28 Br Brake Van kit)
- Peco Website (KNR-49 NE Brake Van kit)
Article dated: 24/04/2013. Added to on 25/02/2016.