


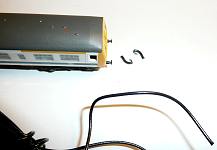
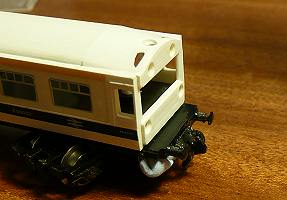
Buffer beam details for n gauge diesel multiple units
First generation diesel multiple units had a hook and screwcoupling in the centre of the buffer beam flanked on either side by vacuum pipes. The most noticeable feature in photographs of these units at work is this pair of pipes - the hook and coupling gets rather lost.
If you are removing the couplings at the ends of the unit, it is worth adding these details to improve the appearance. This article shows how I simulated these details on my early Graham Farish class 101 DMU.
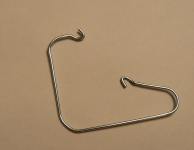
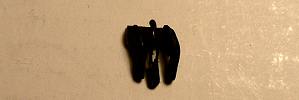
A paper clip was opened and two hooks bent at the ends using small-nosed pliers.
The hooks were then flattened by hammering on a hard surface (a vice).
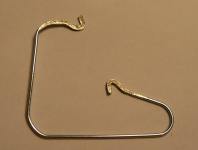
The coupling link was simulated by using a small staple (Bambi stapler: size No: 25). The stapler was used to put a staple in a piece of paper. The paper was cut away at the top to leave a strip of paper holding the bottom of the staple. This helped to ensure that the staple was not lost and also helped in handling the staple. The top of the staple was put over the hook.
The staples were glued to the hooks with epoxy glue. After overnight to set, the paper strips were removed and the units cleaned up.
There are two hoses on either side of the coupling hook. These were made from electrical wire. The coating was stripped off the end and this part bent at a sharp angle so that it could be glued to the buffer beam ( or its sub-unit); the rest was bent into a crescent shape and the wire cut to length.
I have also made some using black-coated paper clips. This was slightly thinner than the electrical wire I was using. The vertical bit that will be glued to the backing should have the coating scraped off to allow better contact for glueing.
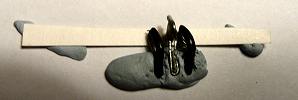
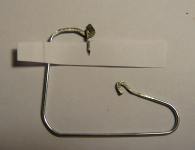
The three items will be glued to a card backing to form a unit. The hook is trimmed to be as short as possible and the pipes are trimmed if necessary to look right. A strip of card is cut (longer than needed to help handling). Embed the three items in blue-tack to keep them in place and also use blue-tack to keep the card in position.
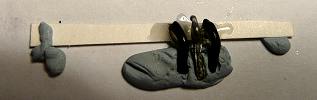
Swing one end of the card away from the details, coat with epoxy glue in the central region and push the strip back to it original position. Check that the three items are still in the right position and allow the glue to set.
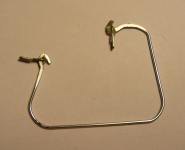
When set, remove from the blue-tack, clean up from any excess glue and paint matt black.
Cut off the card on either side of the unit and make sure you do not loose it!
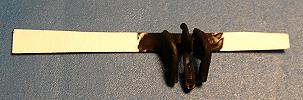
Slice off as much card as possible from the back of the unit. The items should be embedded in a layer of set epoxy glue which will keep them together.
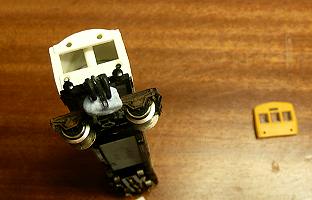
The image left shows how I set up to glue the unit to the buffer beam. The roof and cab front were removed. The bogie was turned sideways. This keeps most thing out of the way and away from the glue. A pad of blue-tack on the bogie will support the unit while the glue sets. Again epoxy glue was used. Why not superglue, you may ask. The simple answer is that I had epoxy; the superglue that I did have in the house was so old that it had set solid.
After the glue has set, remove the blue-tack and refit the cab front and roof.
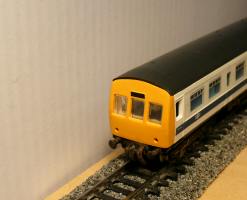
The last stage is to weather the buffer beam and details. I used dry-brushing with an earth-like acrylic paint (Wilkinson Nutmeg test pot). I am sure that you can make a better job of it than I did.
Comments
This is N gauge and the details are small. It is a good idea to keep a handle on all the items and only trim it off at the last minute. This helps picking them up and avoids losing them. I work in a cardboard tray which stops most losses.
The finished article look right from a distance. The details are probably overscale. I am not sure it is necessary to model the hook and coupling. As in the prototype pictures, you only see the pipes, unless you are very close. They should be thinner and closer together.