


Replacing the fuel and air filters on a Peugeot Partner Combi 1.6HDi
Introduction
Up to the present date, there is not a Haynes Manual on the Peugeot Partner Combi with the 1.6 HDi engine. In attempting to service my own Partner Combi, I had problems finding out how to replace the fuel and air filter. I sought help from the internet and found some information but rarely with pictures to help understand what to do. This illustrated article attempts to show you where these filters are and what you need to do. I am not an expert mechanic so I may have not covered all the precautions necessary. Please take this article as part of the information you will need to undertake the work yourself.
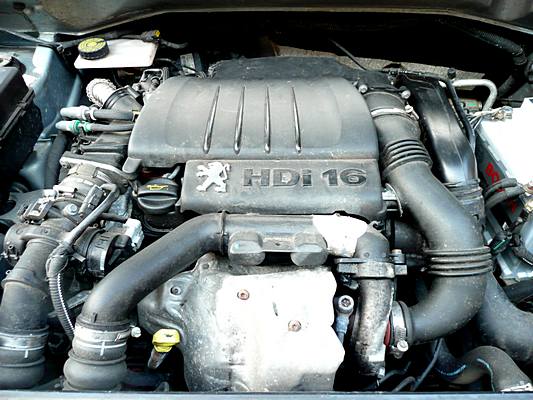
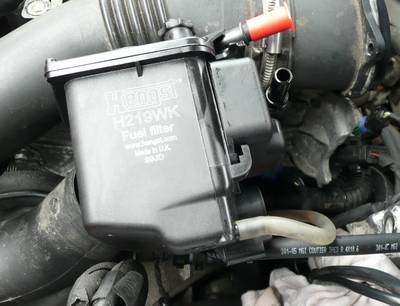
The fuel filter is on the right of the engine as seen above and the air filter behind the engine. Both are covered in this article as you need to remove the same parts to get to them.
Removing items to get access
First remove the engine cover. Just get hold of the sides and pull sharply upwards. The cover will come off.
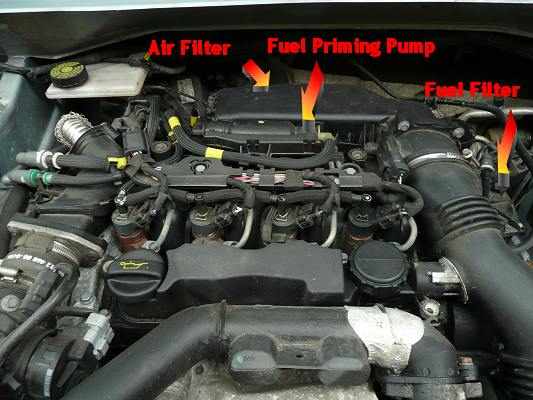
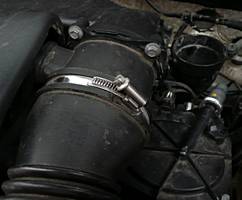
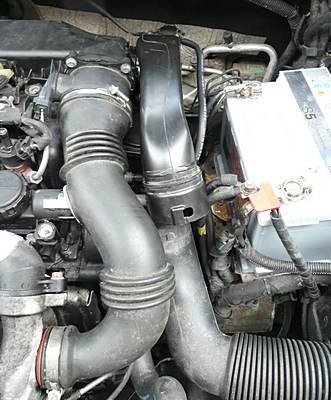
It looks a bit of a nightmare, doesn't it! The arrows show the location of the parts we will be working on. It will be more apparent when we remove the air intake on the right of the engine.
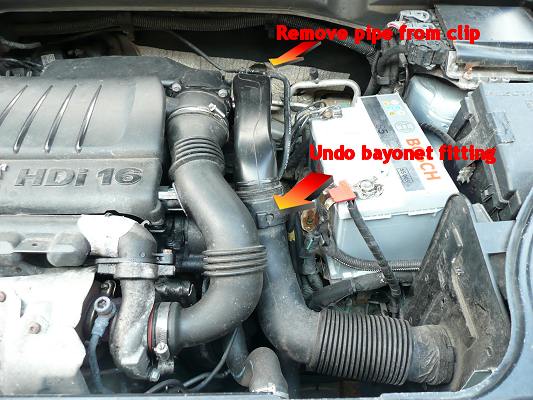
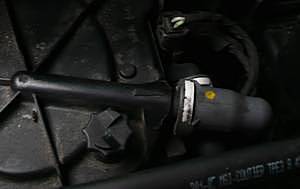
Undo the bayonet fitting shown, unclip the pipe at the back and pull out the intake duct.
Now the fuel filter is clearly visible, but there is not enough room above to take out the filter, so we must remove the other air duct on the left and the air filter with it.
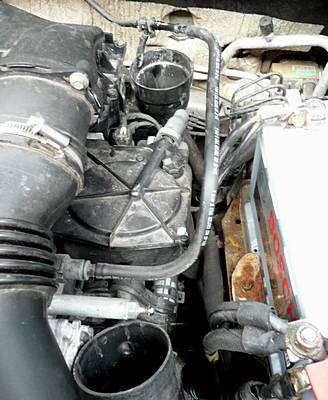
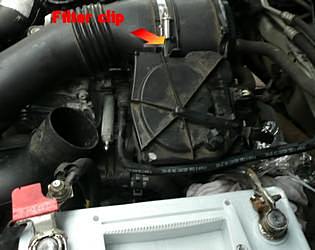
I hoped to avoid removing the duct completely by just undoing the screws at the top allowing vertical movement. But, on refitting it, access to the screw underneath was a fiddle and I had to take off the duct at that point. My recommendation then is first remove the duct. Slacken the large Jubilee clips at either end. The top one is shown in the image. Unclip the sensor half way down and pull off at either end. Take away this duct.
Unscrew the three screws (8mm AF) holding on the air filter box. One is underneath and awkward, as noted above.
Removing the air filter box
With the screws removed, you can remove the air filter box. Just grab hold and pull upwards.
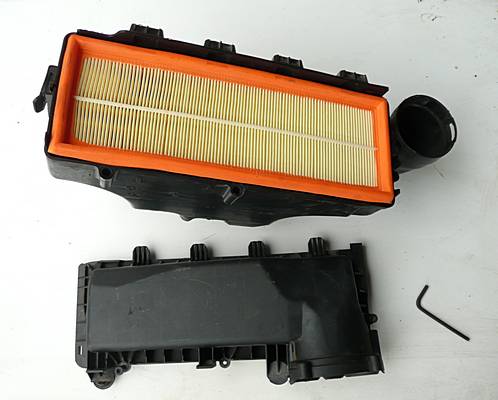
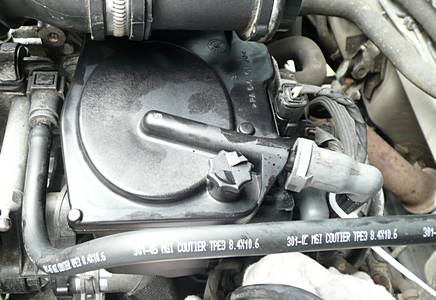
To get access to the filter, unscrew three Allen screws, two in the front visible in the image and the third to the right of the air outlet. Take off the cover, sliding it forward to disengage the tabs.
Fitting the new filter
Take out the old filter and replace with a new one. Refit the cover and tighten up the Allen screws. The air filter box can be left aside while we concentrate on the fuel filter.
Removing the fuel filter
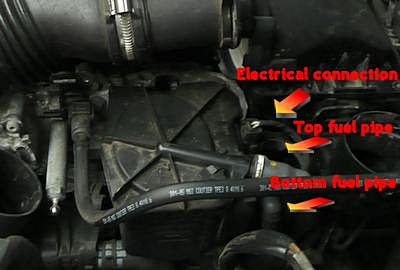
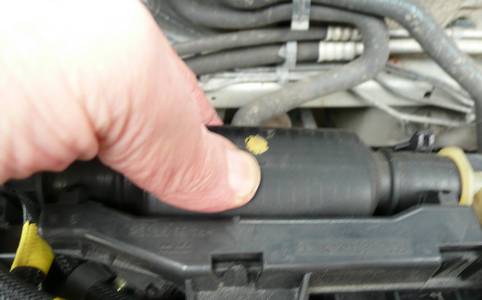
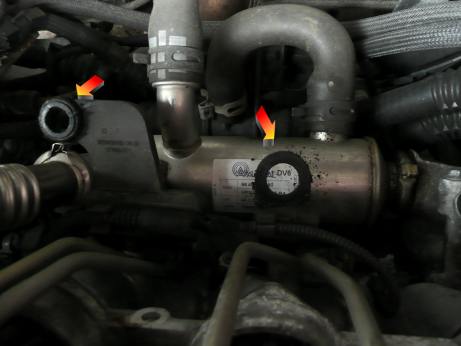
Before removing the fuel filter, there are two fuel pipes to remove, two electrical sensors and a drain tube underneath. Three of these are shown in the photo above. The other electrical connection is below the top one at the base of the filter. The drain tube will come out with the fuel filter and can be detached then.
To remove the fuel pipes, depress the white collar with a screwdriver and it should pull off. To ensure that they went back the same way, I marked the top one with a cable tie. To prevent dirt getting in the tube, I covered the end with clingfilm. Repeat with the second tube underneath. The two electrical connections are a bit of a fiddle to undo. They clip in and it is a case of trying to pull or push the clip lever to release them.
The fuel filter is held in a clip on the side of the engine. There is a plastic lever attached to the filter which engages with the clip. Press this lever and it will be possible to take out the filter. I put a rag underneath to catch any spilt diesel. As it comes out, it will be possible to detach the clear plastic drain tube.
Preparing the new fuel filter
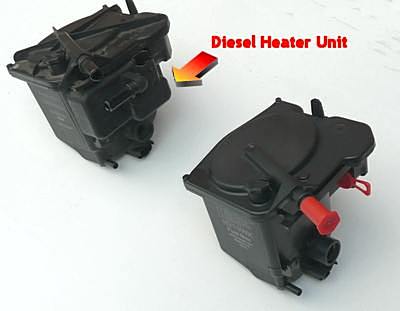
If you compare the new filter (right) with the old (left), you can see a difference. The old filter has a box on the side with an inlet - this is the diesel heater, which must be transferred from the old filter to the new.
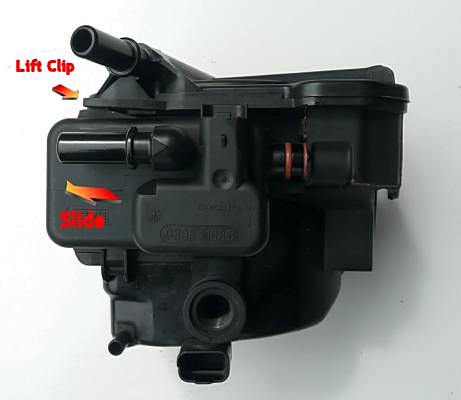
To remove the heater box, you need to release the catch shown with a screwdriver and then the box should slide out (to the left above). I found it would not move and needed some gentle persuasion with a hammer. The box is then transferred to the new filter, sliding it in from the side. To get it fully home, I again found it needed some gentle persuasion with a hammer.
Installing the new fuel filter
With the new filter prepared, it can now be installed in the car. Connect up the clear plastic drain tube as shown and push the filter over the metal clip on the engine and push it down until it clicks in place.
Now deal with the electrical connections. The bottom one is blind, i.e. no connections, on mine anyway. The plug just pushes into the rectangular receptacle on the base of the filter. The other plugs into the diesel heater box that we installed.
The fuel hoses just push back over the pipes and should click into place.
Priming the new fuel filter
I have to confess I did not have a clue on this but I was extremely grateful for a description of how to do it on the Citroen Berlingo Owners Forum by a correspondent called Ron who used photos to describe the process. The engine in the Citroen Berlingo 1.6 HDi is the same as in the Partner.
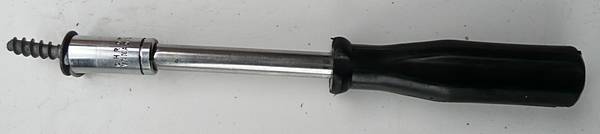
On top of the engine is a black rubber bulb in the fuel line. Continue squeezing this bulb to pump out the air until the pumping gets harder and fuel can be heard going through the pipe back to the tank.
Re-assembly
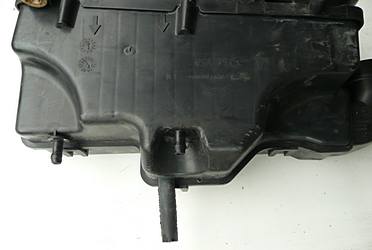
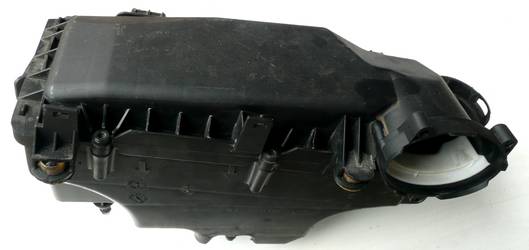
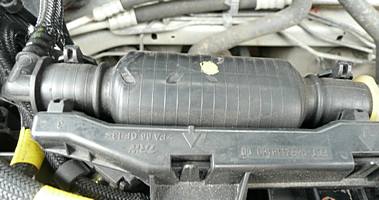
Firstly, the air filter casing should be replaced. This has two locating pins on the bottom (see above) which engage with two brackets at the back of the engine shown in the next picture.
At the top of the filter are two small pins which engage with rubber-lined sockets on the top of the engine. Next, reconnect the air filter casing to the outlet air tube with the three screws; the one underneath is the difficult one. I fixed the screw to the socket with a little Blue-Tack to avoid losing it while I tried to put it in.
Replace the air outlet tube to the turbo, ensuring that the sensor goes back in place and the two Jubilee clips at either end are tightened. Then replace the air inlet tube ensuring that the bayonet connection is correctly in place. Reclip the small tube at the back of this component.
Final Check
Check that all rags, cling film, etc have been removed from under the bonnet and try to start the engine. If you have primed the lines correctly, it should start easily and run continuously (mine did!). If not, you may need to go through priming again.
Replace the engine cover and close the bonnet. It is probably a good idea to take it for a test drive and then, at the end of the drive, lift the bonnet and check for fuel leaks.
Comments
From Geraint Davies (3rd July 2012):
I have heard through local motor factors and other garages that these can be a nightmare to get started after a filter change. The local recommendation is to soak the filter in diesel before fitting. The problem apparently is the filter is so fine that the flow rate through it can be restricted, and the engine won´t start.
Article dated: 26 July 2011. Amended 4th July 2012.
Author: D.Halls
Website: http://www.djhweb.co.uk