


Shell TTA Tank Wagons from Peco kits
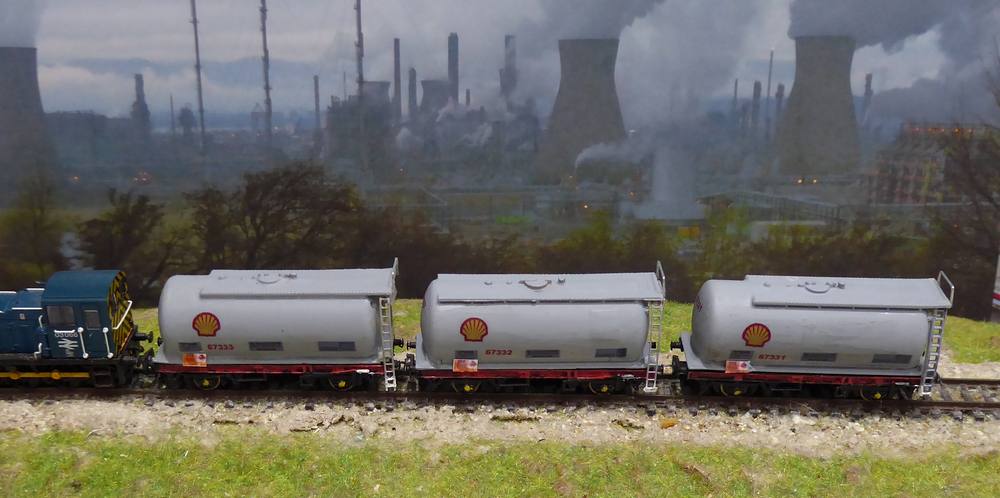
The three TTA wagons with a class 03 Shunter. The background is a photograph of Grangemouth Refinery, which is a little bit of licence as Grangemouth was a BP refinery.
You might imagine that Shell kept a fairly consistent design standard for motifs and warning panels, but this is far from the case, as Paul Bartlett's photos show [Ref 1 ].
- Most wagons had the Shell trademark symbol but some had none
- Some had an additional motif of red and yellow horizontal lines
- The TTA panel and the various warning panels on the base of the tank did not follow a consistent pattern. Neither did the location of the red wagon numbers.
- The Hazard Warning Panels were sometimes fixed to the tank surface or on a separate plate fixed to the top of the solebar
I decided to make my life simpler by adopting the simpler motif with Shell logo only and a consistent pattern of warning panels. The Hazard panels were to be on separate plates.
The models
The basis of these wagons was the Peco kit (KNR-50) for a 15Ft Wheelbase Tank Wagon. The kits are inexpensive and easy to put together.
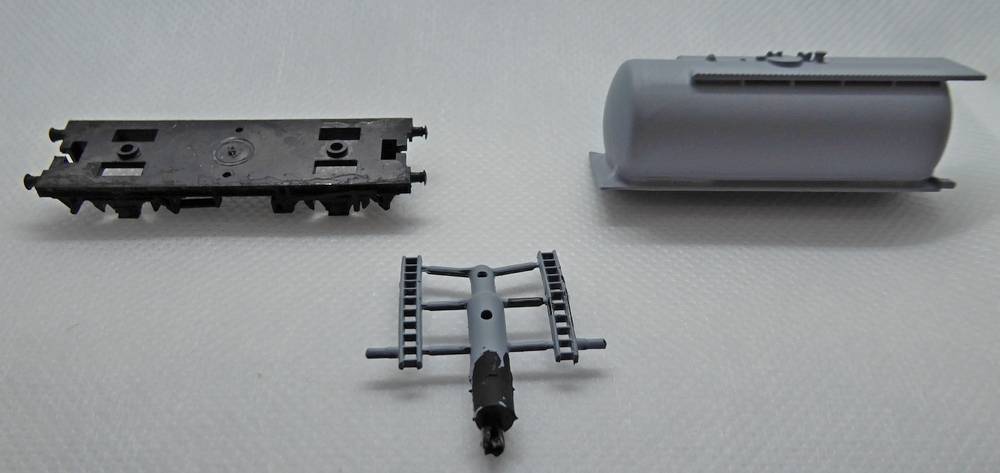
The main parts of the kit are shown above. Also included, but not shown, are couplings and wheels. The chassis was painted matt black and the ladders and tank sprayed with Wilco Grey Primer.
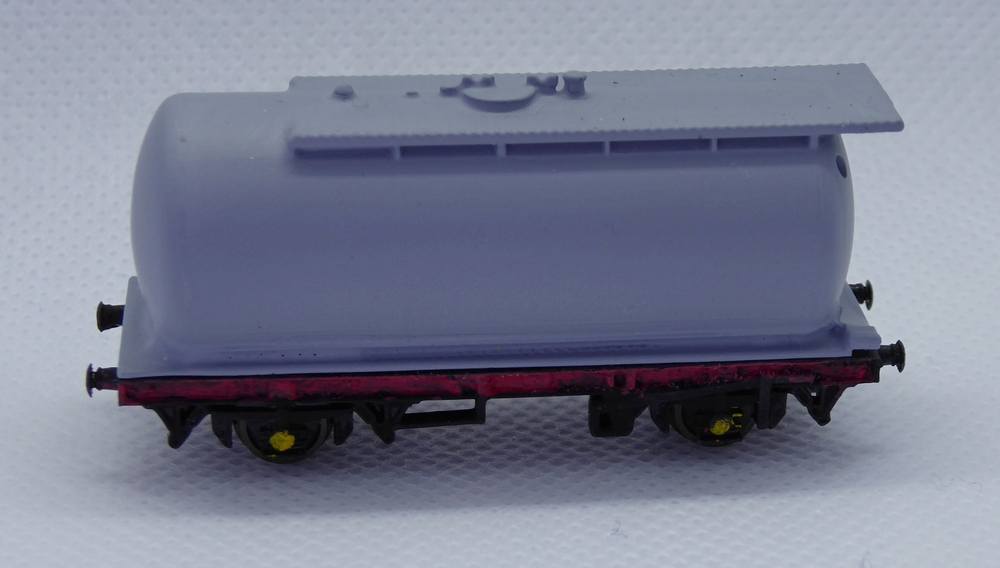
The solebars were painted red and the axleboxes painted with a blob of yellow paint. In real life, yellow means roller bearings fitted. I used Graham Farish metal wagon wheels in preference to the Peco platic wheels.
The couplings are my own development of magnetic couplings similar to those i described for coupling DMUs [Ref.2}. One end has a cut-back Rapido or Elsie couupling onto which a 2 x 0.5 mm neodymium magnet is superglued. The other end has a 10 mm steel staple, cut shorter and fixed in the coupling box with Black Milliput Epoxy Filler.
Decals
I bought some nice looking decals and tried it out on one wagon. I was not completely happy with the result for two reasons:-
- The decals were on a full grey background which did not match the grey primer I had used on the wagons or any of the grey paints I had in my possession. As we now know, there are "Fifty Shades of Grey", so my chances of finding the right grey might be small.
- The colour of the Shell logo seemed rather dull
I decided to make my own decals. I had learned quite a lot in using the commercial decals, so it was not a waste of money. A Word document was prepared with resized images of the Shell logo found on the internet; a series of numbers in a red Arial 6 pt font and a banner image of the warning panels for the base of the tank. This was printed on a sheet of waterslide transfer paper from Mr Decal[Ref. 3].
The decal sheet that I prepared can be downloaded here . This is not a commercial product and I offer it to you for experimentation without guarantee of accuracy or reliabilty.
The tanks of the wagons were painted with a gloss varnish (Johnson's Klear) and the transfers applied to the surface following the instructions with the product.
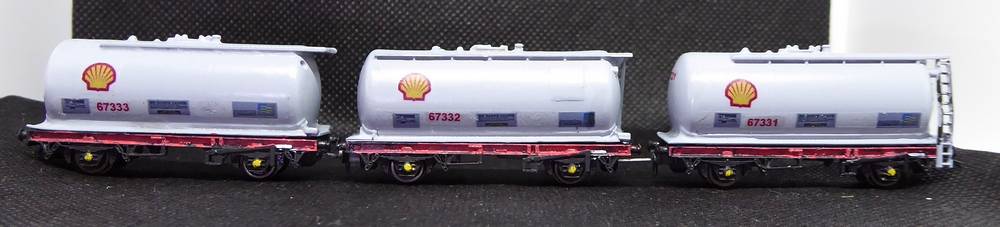
Decals on gloss varnished wagons
When it had all dried and hardened, a coat of matt varnish (Winsor and Newtons Artists Matt Varnish} was applied.
Ladders and handrails
The Peco ladders are good quality for plastic mouldings but etched brass ones are finer. I had broken some of the plastic ladders and lost one, so I only fitted the plastic ladders to one of the three wagons. The others had etched signal ladders from CR Signals [Ref. 3 ] cut to size, shaped and glued in place with a little superglue. These were painted with grey paint.
On the real wagons, the bottom rungs of the ladders are painted white, so I painted mine white as well. The ends of the brake levers were painted white as well.
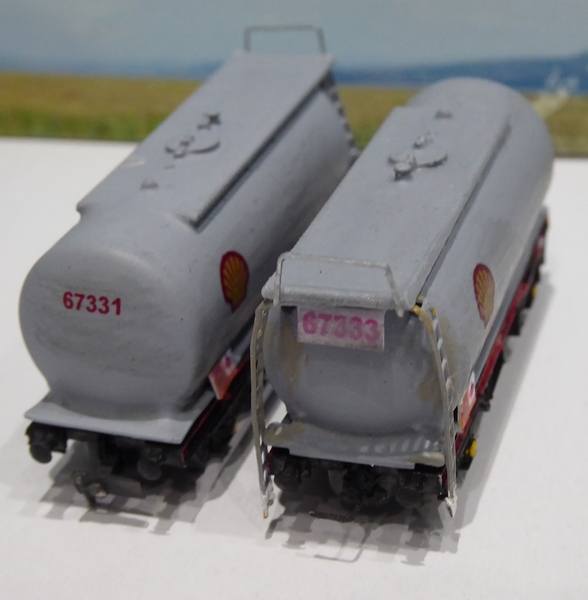
Paul Bartlett's photos of the Shell TTA wagon [Ref 1] indicate that there was a handrail for the platform at the top of the ladders. This was represented by a 10 mm staple with the prongs cut back; it was glued with superglue to the edge of the platform.
THe image above also shows the use of end wagon numbers which follows prototype practice [Ref.1]. On the uncluttered end, the number is directly on the tank surface. On the opposite end with the ladders, the number is on a plate attached beneath the platform. The red number was printed with a grey background onto thin card. The plate was cut out with twice the visible height and the top half was bent at right angles to give a tab which could be glued under the platform.
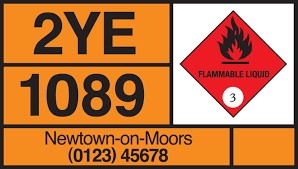
The government kindly provides an image of a Hazard Warning Plate [Ref. 5]. This was resized and printed onto thin card. The rectangle was cut out and glued to the top of the solebar
Final Comments
I suppose I really should weather these wagons and probably put a streak of oil from the filler cap. However, none of the wagons I have built so far have been so colourful or attractive, so for the time being I would like to enjoy them just as they are.
The Peco 15 ft Tank wagon (KNR50) is a nice kit at a very reasonable cost and can be finished in a number of different liveries.
I guess the most important thing I have learned from this project has been how to produce my own decals.
References
- Paul Bartlett's Photos of Shell TTA wagonsand Pickering-built TTAs/
- Magnetic couplers for diesel multiple units in N gauge
- CR Signals - N gauge brass ladders
- Mr Decal Waterslide Decal paper
- Hazard Warning Plates
Article dated: 25/06/2020