


Two BR MK 1 Full Brake Parcels Coaches
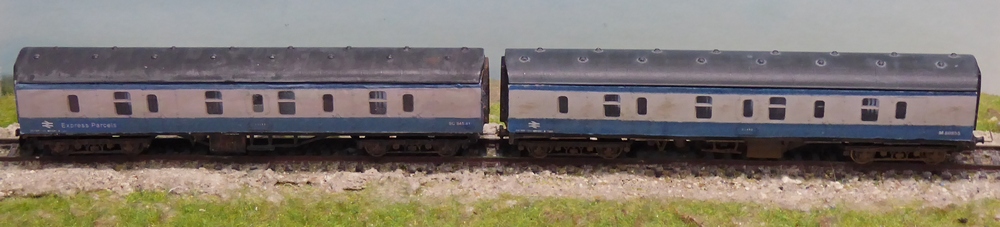
I actually had used the chassis and bogies from one of them on another project, so I was left with one body and another full vehicle which I thought I would turn into parcels coaches in standard blue and white livery. I tried painting the body but it was not a success. I thought my best option was to use my printer to produce a side.
This article describes my experience in using paper overlays and in making a home-made chassis.
BR parcels vehicles were rarely washed and so most photos show very grubby vehicles. Although, the coaches have glazed windows, it is very unlikely that you could see much through them, so I did not see a necessity to have glazed window openings, just dark windows flush with the bodywork.
The BR MK 1 Full Brake with Graham Farish Chassis
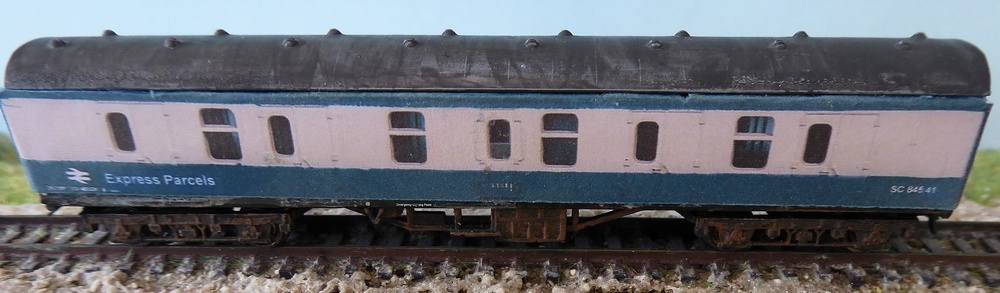
This is the unchanged original Graham Farish coach with paper overlays and is my second attempt. I was not completely happy with my first overlays and so took them off and replaced them with these.
The choice in making overlays is either to draw up your own artwork or to use a photograph of a commercial model or somebody else's model. Ideally, a photograph of a real coach woould be good but railway photographers do not take photographs of coaches side on. The consideration of copyright also makes using a photograph an issue. I have a very nice Lima N gauge full brake which I find difficult to use because the N scale that Lima used is not 1:148 so the coach is smaller than other vehicles. For making overlays, I took a photograph of this coach side on and worked on it using image-editing software to produce a side 118 x 14 mm.
The first rework of this image was used on the second full brake shown below and is largely unamended. For my reworking of this coach, I tried to make it different, so I added "Express Parcels", a half-open guards window and a different coach number. It also included fold-over tabs at top and bottom to try to stop white edges - I am not sure that this was successful, however.

The sides were printed on quality copy paper and sealed with a sprayed coat of matt varnish (Ghiant Inkjet Fix Matte)
The sides of the coach body were sanded flat to remove any projections such as handrails and to provide a key for glueing. When dry, the sides were cut out, the top and bottom tabs folded over and the sides fitted to the body with Pritt Glue Stick.
BR MK 1 Full Brake with home-made underframe
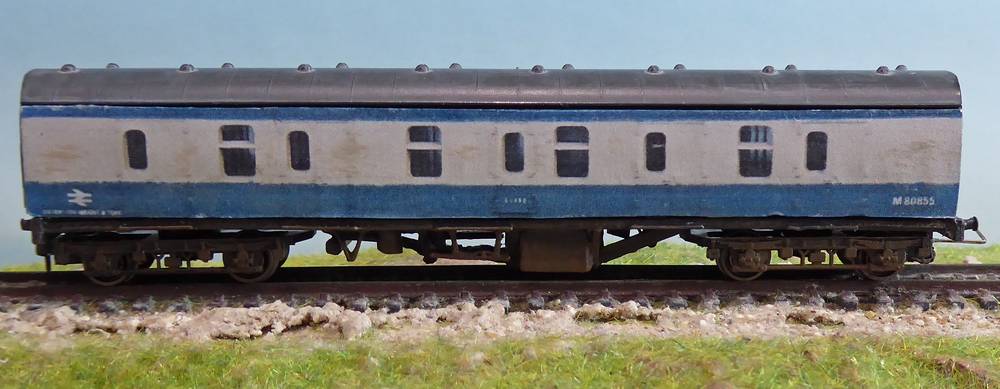
The body was treated in the same way as described above for the first coach. The printed side is shown below:

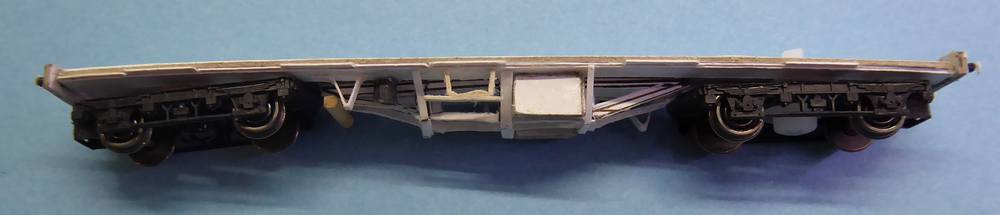
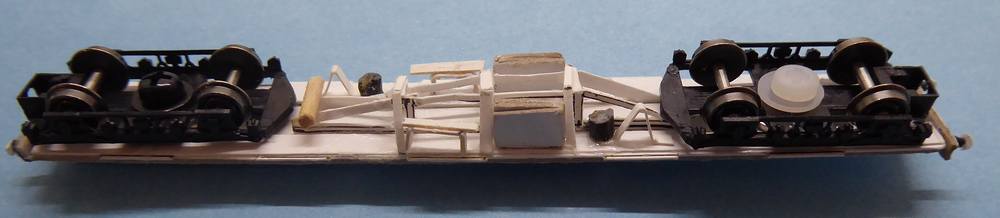
The underframe needs to look realistic when viewed from the side, so we can use card strips side-on and not worry about the width. The only way you are going to get a good view of the real coach underframe is of you are run over by a train and then the width of the truss members may not be your biggest concern. The underframe will also be in the shade so it doed not have to be a perfect representation of reality. The point is illustrated above by the V-hanger which is narrow end-on but is a card strip bent and glued in place by tabs with PVA.
Most of the structure is made from thin card strip; the dynamo is cut from a wooden cocktail stick and the vacuum cylinders are from black Milliput filler. This is surplus filler from other applications which was rolled into a long cylinder and kept for applications such as this. A small section is cut off and fixed in position with superglue. The chassis as shown above is slightly bowed but this will straighten out when it is fixed to the body.
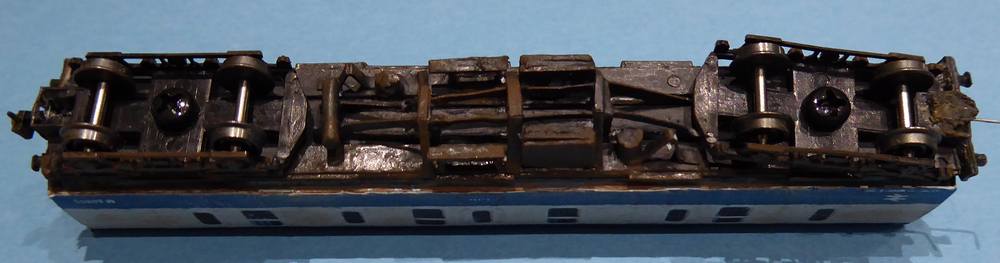
The bogies are MK 1 Graham Farish bogies from Peters Spares and are fitted with Graham Farish coach wheels. The couplings fitted are my own magnetic couplings.
The bogies and chassis were painted with matt black enamel, followed by two washes of a brown earth-like acrylic colour to give it a rusty weathered appearance.

My method for the manufacture of N gauge buffers beams and buffers for coaches is described in the article Buffer Beams and Buffer.
Fixing body to underframe
I was not happy with my original way to provide a pivot to the bogie and to fix the body to the underframe. This second attempt seems more satisfactory and uses Nylon M3 screws, nuts and washers, bought on eBay.
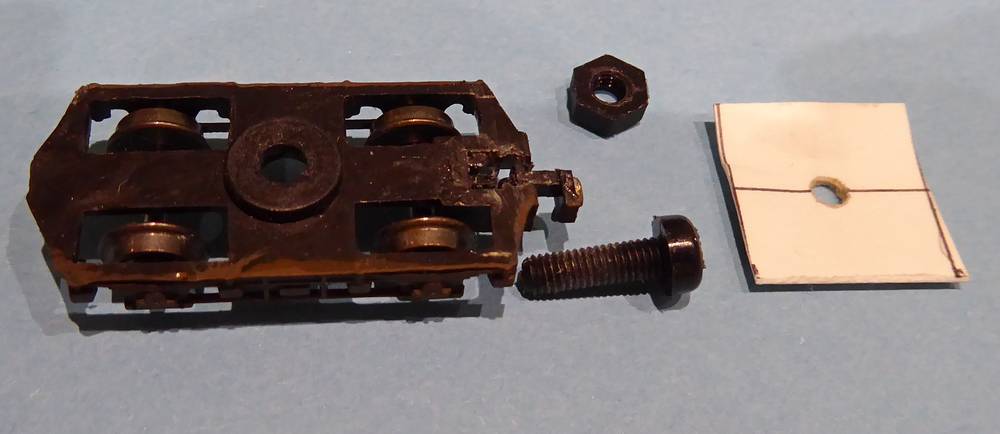
The pivot hole in the bogie is larger than the diameter of the M3 screw, so the first thing is to superglue a M3 washer to the top of the bogie checking underneath that the two holes are concentric. The chassis has 3 mm holes at the bogie pivot positions for the screw to pass through.
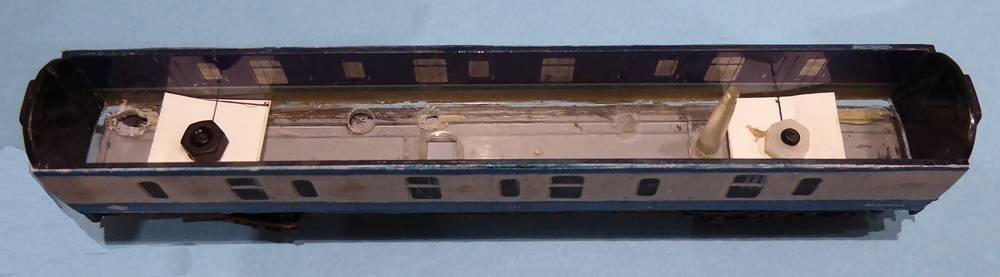
Drilling corresponding holes in the body floor was not feasible. One corresponded with a clear plastic pillar that supported the roof. This had to be removed and the areas for the screws at both ends were opened up with files so that the screws could pass through. To retain the screw centrally two card pieces were made of the same width as the coach inside and drilled a 3 mm hole in the centre, as shown in the above two photographs. The screw was passed through this and the nut tightened, after checking that the body was aligned correctly on the chassis. At this point, the bogie is not able to rotate, so the screw is unscrewed sufficiently for the bogie to move freely.
Conclusions
I guess I realised soon after starting to try to scratch-build models in N gauge that my printer coupled to a computer was likely to be my best friend. The ability to print out in colour with fine detail directly onto card, paper or acetate sheet would overcome many of my difficulties in trying to work in such a small scale. The ability to print out coach sides directly would save the hassle of painting and putting on decals and lining. I think this article shows that the idea has merit, although the execution needs further development and more skill on my part.
It was also clear that I would never be able to produce models in such detail as is now available commercially, but life is always a compromise. Rather than look at the detail on N gauge models blown up by photography to look like O gauge models, I prefer to look at photographs of trains on the internet and aim to get something like it looks at a distance, rather like you would actually see on a model layout. Look at the locomotive, coach and wagon and pick the things which hit the eye and should be got right and that which does not matter. Modern coaching stock with tinted windows is mainly flat and you cannot see in the windows. If you want your coaches to be illuminated, then you need clear windows but if you only run trains in daylight then printing them as dark areas onto gloss photocard should work well. Here a parcels coach with small, often dirty, windows really does not need glazing. Similarly, the chassis underframe again very often in shadow only needs to look right when viewed side on.
I was pleased at how the steps on the solebar worked out. It is just an extra layer on the chassis base.
References
Sources of Information and Inspiration:
- Parcels, Mail and NPCCS. Parcels stock from the EMGauge 70s group.
- Paul Bartlett's photographs of parcels stock
Article dated: 01/08/2020