


Buffer Beams and Buffers

This article shows how you can make buffers and buffer beams for N gauge from easily-available materials.
The method
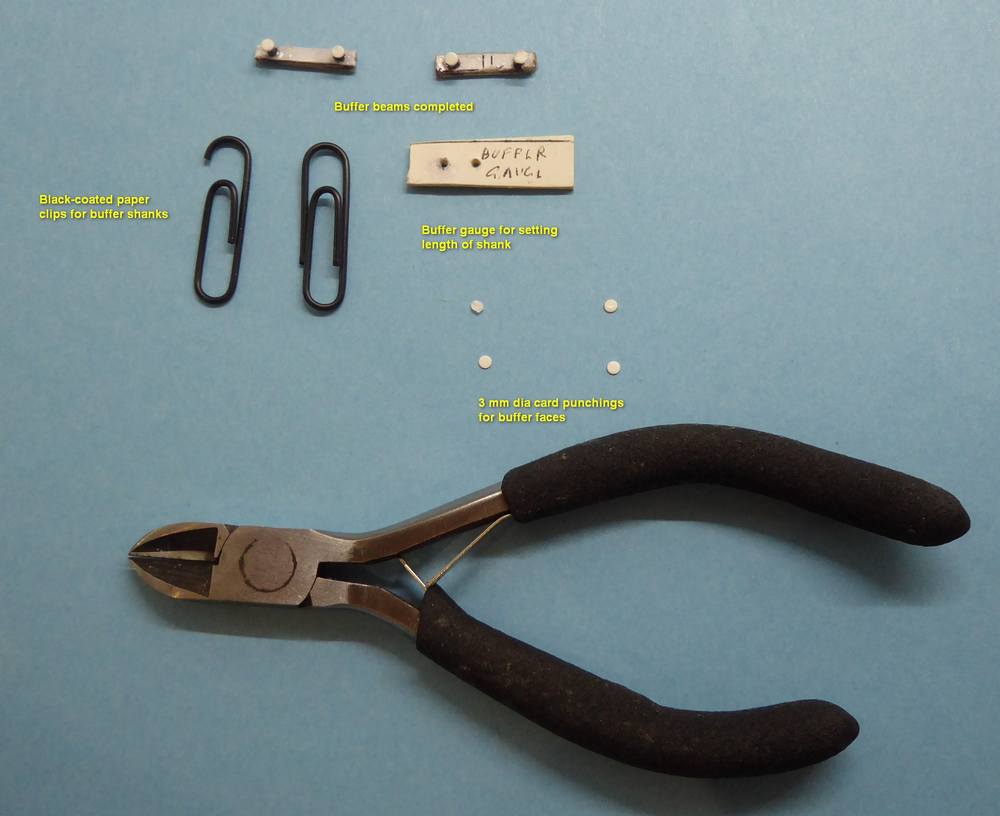
The buffer beams are made from 1 mm card. It is better to mark out the card and drill the holes before cutting to size to prevent the action of drilling breaking the beam in two. In N gauge, the buffer centres should be 12 mm apart and the hole should be 1 mm diameter. The suggestion here is to use a black-coated paper clip which provides 1 mm wire already black. Ordinary paper clips or 1 mm copper wire from cable could also be used. After the holes are drilled, cut the buffer beam to size.
Cut two straight lengths of paper clip or wire to make the shanks. Although the actual shanks will be short, use a reasonable length for ease of handling and to help with alignment. Put a drop of superglue on the ends and push into the holes in the buffer beams. Make sure the two wires are aligned before the glue sets.
To cut to consistent length, I made a gauge from 1 mm card with a 1 mm hole in it - if necessary, make the hole slightly larger so it slips over the wire easily. Place over the shank and, using the flat side of the wire-cutters flush with the gauge, cut through the wire.
The buffer faces are punched out of thin card using a rotary leather punch, set to 3 mm. Although the hole size is 3 mm, the punchings are 2 mm dia. They collect in the tube of the punch and need to be pushed out with a piece of wire. Glueing the faces to the shafts is tricky; I recommend putting the card discs on a flat surface, putting a drop of superglue on the end of the shaft and then turning the buffer beam upside down to pick up one of the discs. If necessary, use a cocktail stick or tweezers to adjust the buffer face to its correct position. Repeat for the other buffer. I should explain what I mean by "drop of superglue". I put some superglue first on a scrap piece of card and then take a blob of superglue from this to the buffer shaft.
Buffers for diesel multiple units (DMUs)
The buffer faces for DMUs are larger than those used for coaches. The two blue/grey DMUs that I have from Graham Farish (class 101 and 108 - now both old) do not show this. The buffer face diameter is larger than the width of height of the buffer beam so that the top of the face overlaps the yellow end of the DMU. I refer you to the excellent railway photography website of Martin Loader, particularly this photograph. The buffer faces were painted silver for a special event, making the overlap more visible. As this photograph is taken straight on, the image allows the size of the buffer face to be calculated using either the track gauge (4 ft 8 1/2 inches) or the distance between buffer centres as a starting basis. My calculation shows that the buffer faces should be about 3.3 mm in N scale (1:148). Fortunately, the punchings from my 2-hole paper punch are almost exactly the right size. This also has the advantage over the leather punch in that the punchings can easily be collected from the clip-on plastic tray underneath.
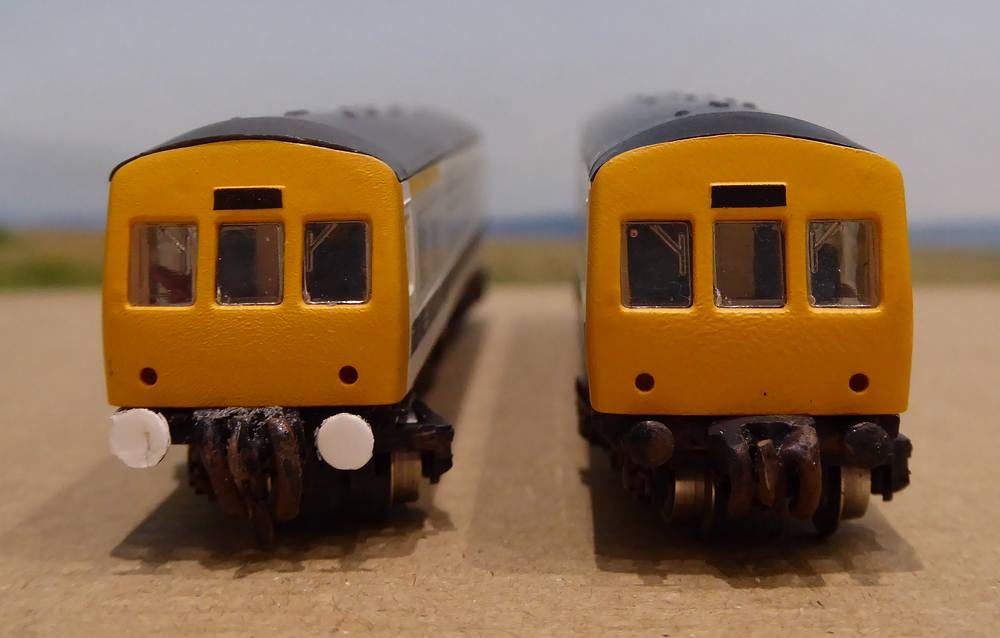
The existing buffer face is flattened with a sanding stick and the card punching glued onto the face with superglue. The photograph shows one end modified and the other unmodified. The larger buffer face looks more realistic.
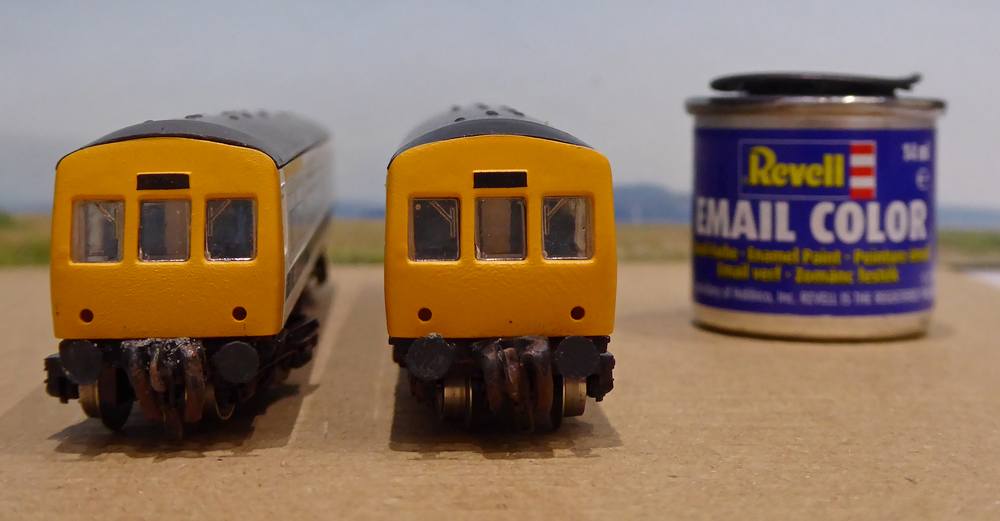
When the glue has set, the faces can be painted. I used Revell Matt Anthracite.
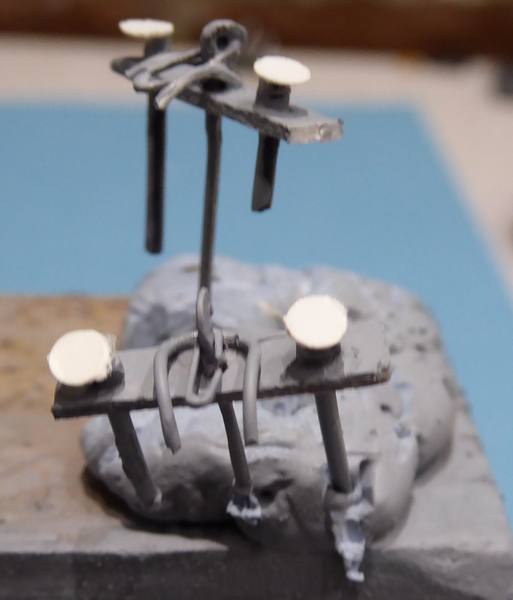
Making a set of buffer beams for a DMU from scratch
This is for the front and rear of a DMU and includes buffers, coupling hook with chain and vacuum pipes. My first attempts were with 1 mm card for the beams, but it lost its shape after drilling and handling, so I tried 1 mm foamboard and was very impressed how it retained its rigidity.
These are the materials that were used in the construction:-
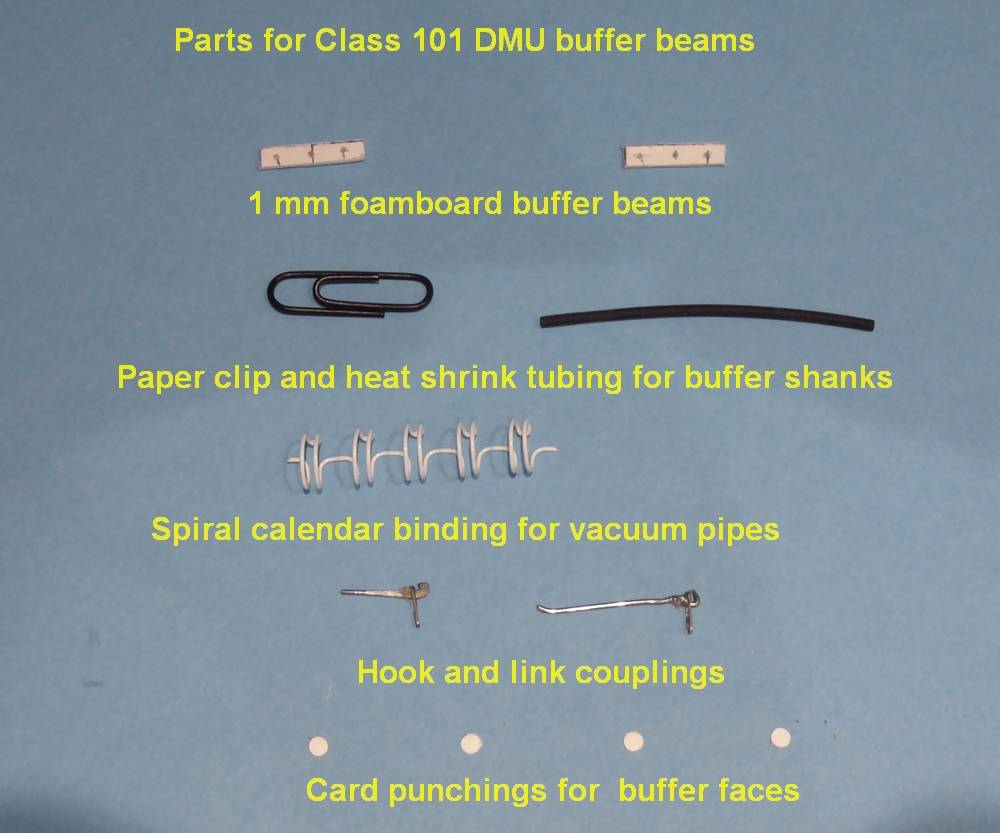
The materials used for the hook and coupling are shown here:
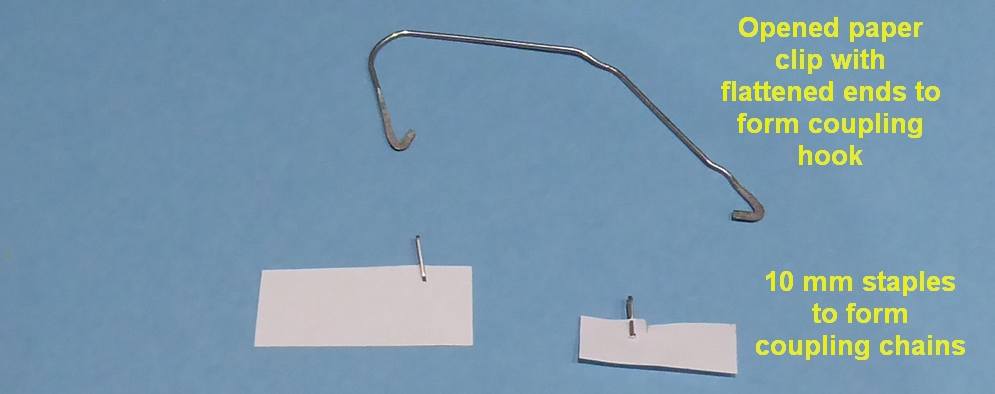
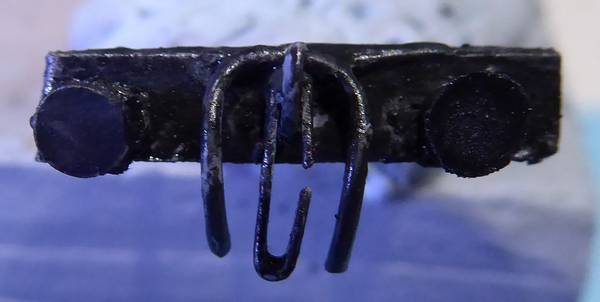
A paperclip is opened up and the two ends are bent round with a pair of pliers to form a small hook. The hook ends are flattened by hammering on a metal surface (I used the back of a vice) or squeezed in a vice or large pair of pliers. Cut the two ends but ensure you keep an excess of straight wire as this will help handling. All the excess will be cut off when the construction is complete.
The chain is represented by a 10 mm staple. Use the stapler to put two staples in a piece of paper. Again we will need to be able to handle the staple in glueing so keep a paper "handle" on it but cut off the paper around the top half as shown above.
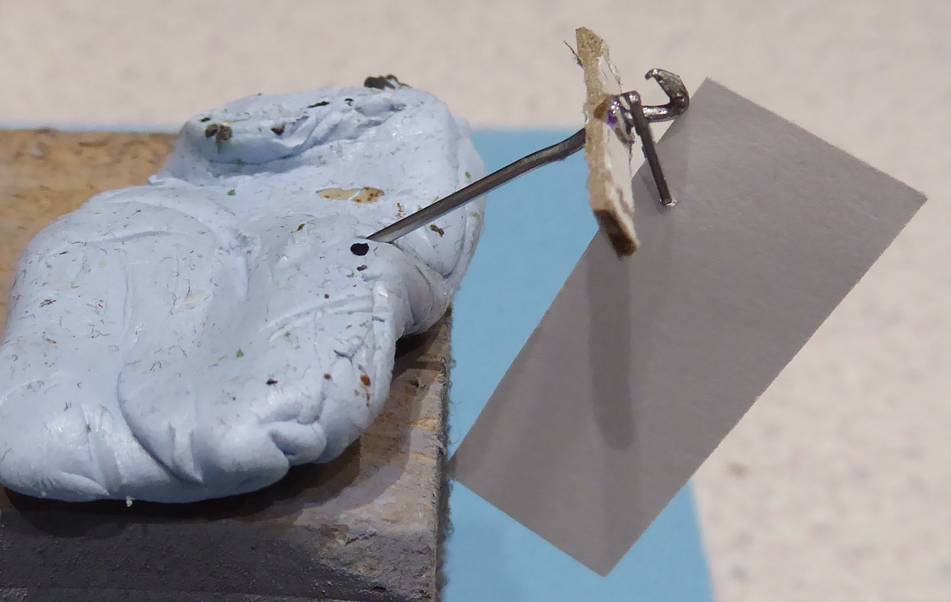
The staple is superglued to the top of the hook as shown above. I used a block of bluetack to hold the back of the hook wire. Once the glue is set, the paper "handle" can be cut off.
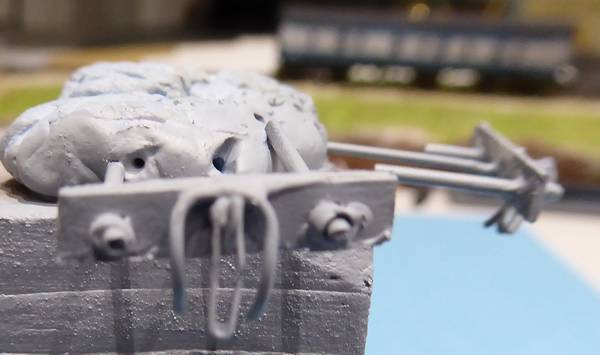
The buffer beam is 18 x 3 mm and cut from 1 mm foamboard. I expect the right quality of card would work but as you can see in the above photo, the card I used looked a bit deformed after drilling and cutting. The Foamex foamboard was much better. Three 1 mm holes are required for the buffers and the central hook/coupling.

The hook/coupling is superglued into the centre hole and two lengths of black paperclip wire are superglued into the outer two holes, using the buffer gauge shown in the second photo in this article. The DMU buffers are chunkier than coach buffers and so I added a 1 mm length of shrink tube to each buffer shank and glued it on the underside to the buffer beam. I tried making a guide to cutting a consistent length of tube, but it was not a great success.
I kept a section of spiral calendar binding when cutting up an old calendar as I thought the curvature would be useful in representing vacuum pipes. A section was cut to length and the shape manipulated with pliers so I could add it as a bridge over the top of the coupling hook. OK, it is not strcictly correct but I reckoned the top of the buffer beam would be shaded by the DMU body, so the bridge would not be so obvious.The top was superglued to the buffer beam.
The beams were sprayed then with Wilco grey primer.
Then the buffer faces were superglued to the buffer shanks.
The buffer beams were then painted with Revell Anthracite Grey enamel.
Conclusions
This article shows how buffer beams and buffers can be made. No commercial products are used but the items made from commonly available materials. They are not perfect but I think for N gauge they suffice.
References
- Photo of class 101 DMU showing buffers
- Buffer beam details for n gauge diesel multiple unitsAdding buffer beam details to a Graham Farish class 101 DMU without drilling the buffer beams.
Article dated: 30/07/2020. Updated: 31/08/2020